mirror of
https://github.com/bassamanator/Sovol-SV06-firmware.git
synced 2025-12-31 05:14:17 +00:00
3caf21bc8bb76491c246b3569b3afcfa1175426a
🚨 One-Stop-Shop Sovol SV06 Klipper Configuration
This branch contains the Klipper configuration and firmware for the Sovol SV06 3D printer with the BTT SKR-Mini-E3-V3.0 motherboard.
If you were looking for my OSS Klipper Configuration for the Sovol SV06 with completely stock hardware, please refer to the master branch.
I am creating these files for my personal use and cannot be held responsible for what it might do to your printer.
❗☠️ I do not own this board so everything found on this branch is COMPLETELY UNTESTED ☠️❗
❗☠️ USE AT YOUR OWN RISK. YOU HAVE BEEN WARNED. ☠️❗
An Important Note
⭐ A big thank you to Github user transistor1. This branch would not have been possible without his help. Please checkout his profile here. ⭐
Installation Instructions
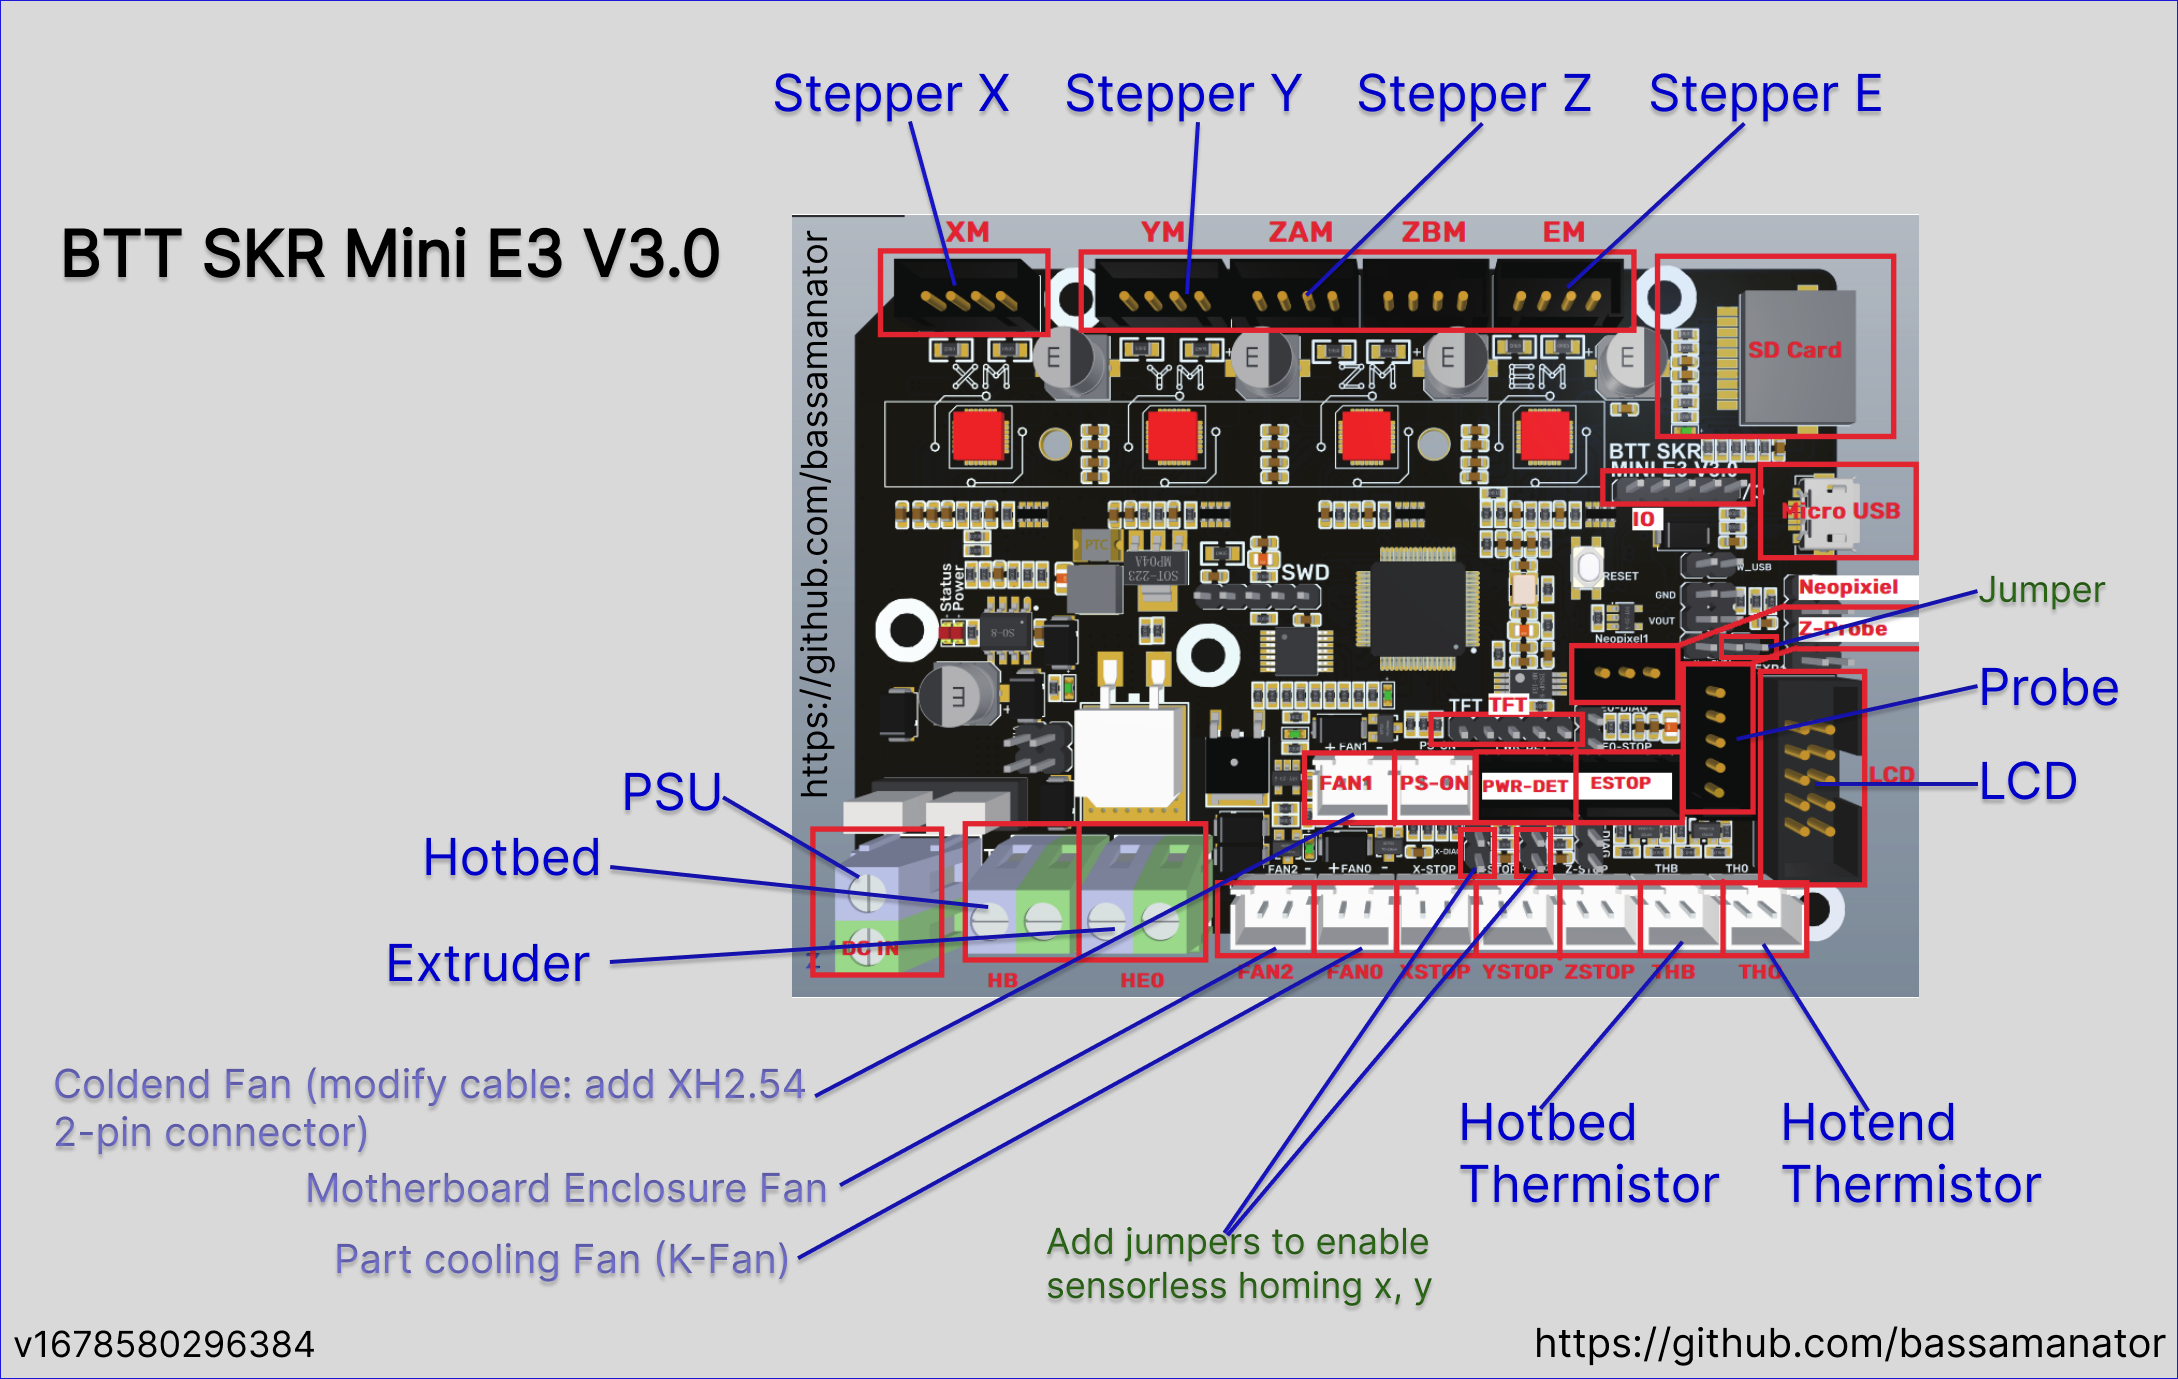
Electronic Wiring
Wire cables according to the following diagram:

Download Firmware Precompiled by BIGTREETECH
- firmware-USB.bin. Connect the SKR-Mini to the Raspberry Pi via USB connection.
- firmware-USART2.bin. Use TFT port USART2 to communicate with raspberry pi. Connect the UART-TX of raspberry pi with the USART-RX2 of motherboard and connect the UART-RX of raspberry pi with the USART-TX2 of motherboard directly to communicate normally.
Alternatively, find instructions on how to build the firmware yourself here.
Flash Firmware
- Rename
firmware-USB.binorfirmware-USART2.bintofirmware.bin. Important: If the file is not renamed, the bootloader will not be updated properly. - Copy
firmware.binto the root directory of the microSD card (make sure the card is in FAT32 format). - Power off the SKR-mini-E3-V3.0.
- Insert the microSD card.
- Power on the SKR-mini-E3-V3.0.
- After a few seconds, the SKR-mini-E3-V3.0 should be flashed.
- You can confirm that the flash was successful, by running ls /dev/serial/by-id. If the flash was successful, you'll see something like the following:

Download Klipper Configuration
- Download printer-skr-mini-e3-v3.cfg and rename it to
printer.cfg. This is the onlyprinter.cfgthat you will be using. Anytime there is a reference toprinter.cfg, you will use thisprinter.cfgthat you just saved/renamed. - Follow the instructions found in the Download Klipper Configuration section and onwards. 💡 Remember to use the
printer.cfgthat you saved in step 1.
Sources
Languages
Markdown
100%